Our expert trainers can help you get the best results.
If you would like any further information please contact one of our training advisors.
It wasn’t until 1989 that spreadsheet programs enabled more than one sheet in what is now a workbook. The initial maximum limit was 255 sheets in a workbook. The current limit is limited only by available memory. Not to be confused with the Excel Options > General > When Creating New Workbooks > Include this many sheets. This is limited to 255 sheets. You can still add more once the file is created.

Multiple Files
Unless you have invoked Shared Workbooks, an Excel File will not allow multiple simultaneous users. This would be a reason for splitting your project data across multiple Excel files leaving you with the problem of combining the data for summarising along with maintenance issues for the links or connections and timing your access to the files as and when then are ready.
Five files –Requires File Linking:

Whilst broken links can always be repaired (Data Tab > Connections Group > Edit Links) that’s no use if the files have gone walk about.
Tip:
Try to keep all files in the same folder. Most Office programs (Not all) will pick up relative file paths successfully by default.
Multiple Sheets.
Keeping all you project data in one file avoids those maintenance issues but probably means that you are going to end up with a very large file and all your eggs in the one basket. OK if you’re going for scrambled egg.
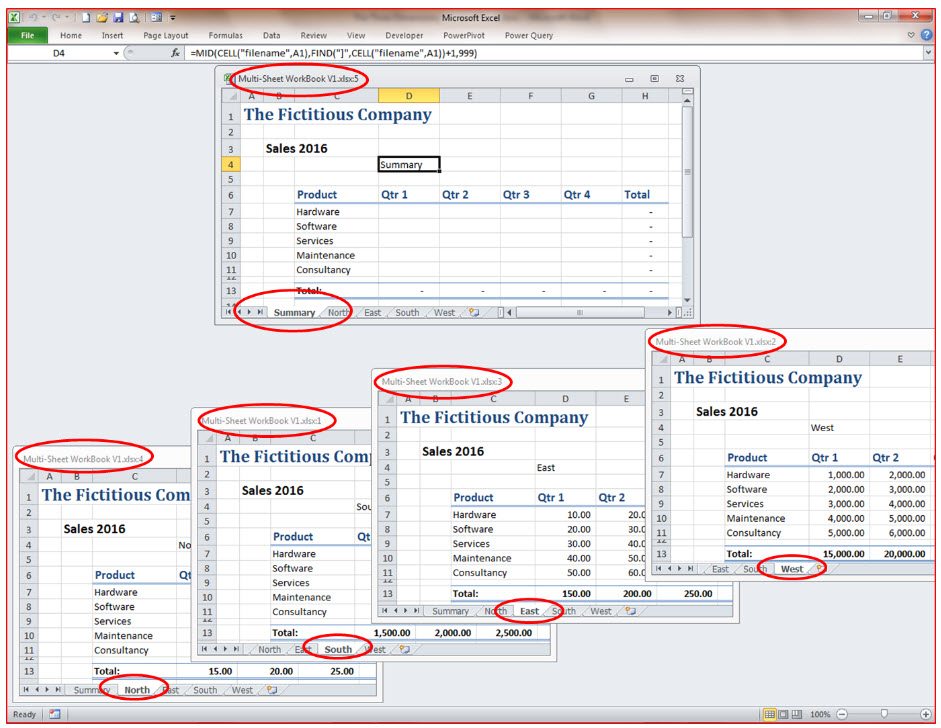
One file – Multiple Sheets (5)
( This view is showing multiple Windows on the Same file. Note the FileName.xlsx:N in the Title bars)
So who is responsible for the quality of the data in you Excel file? I mention this as I have noted in life that if ONE person owns a file they tend to take a sense of pride and ownership in their efforts. So if many individuals are contributing to your project data it might be best to give them their own file as an input device and then you link or connect to those files. This is where Power Query and Power Pivot will come in useful.
3-D Workbook Issues
In this article I am going to address some issues and tricks when working with and editing Workbooks with multiple sheets. The presumption from here on is that most of the sheets are laid out in the same manner right down to having type of information and formulas in exactly the same cells. Each sheet differing in that it contains data for a specific business unit/time period/product type/etc.
You may want to anticipate your final goal in terms of presenting your results. A more flexible method of storing and analysing your data would be to store it in a single Excel table and use other tools like Pivot Tables or MS Query to produce the reports you need.
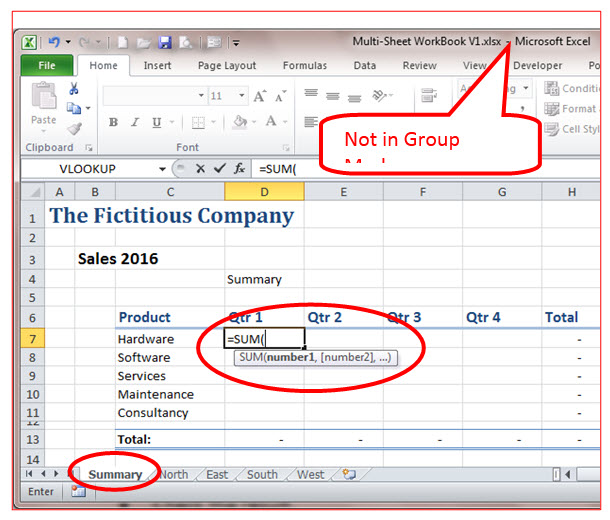
Group Mode Working
Group Mode Working occurs when 2 or more sheets are selected.
All edits made to the Activesheet when in Group Mode will apply to all other sheets in the group. This is ideal for labels, formatting, column widths, calculations etc. but definitely not what you want to be doing if entering raw data intended for one sheet only. It will overwrite the other sheets without any warning.
How do You Know you are in Group Mode?
Excel does tell you but few seem to notice. In the Title bar at the top of your Excel Window you will see: Filename [Group] – Microsoft Excel
Trap
Excel will drop out of Group mode according to the following rules:
Tip
Pay close attention to the indicator in the title bar and keep backup copies of your workbook. You may not notice your accident immediately!
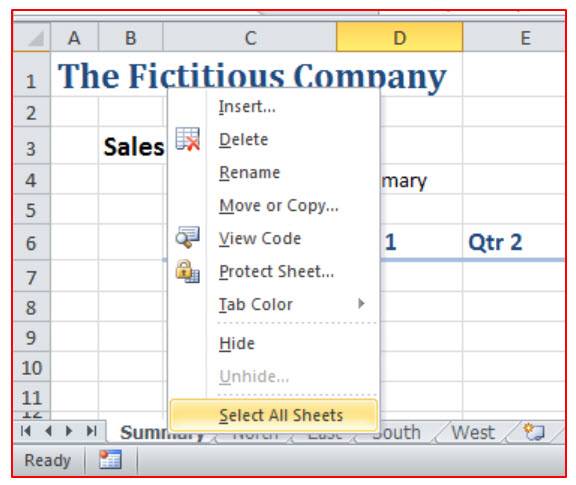
Group Selection Techniques – Contiguous Selection.
A Right Click
Using a right click on any sheet tab offers: Select All Sheets.
Using the Mouse and the Shift key.
Select the first (Leftmost) sheet that you intend to include in the group. Holding the Shift key down just click on the last (Rightmost) sheet that you intend to include in the group. (The Shift key and any form of navigation will extend or contract a selection in any Windows application.)
Observe:
The Title bar shows [Group] and appropriate sheet tabs have gone “Bright”. If the sheet tabs are coloured then notice Excel’s half shading to indicate that they are all selected.
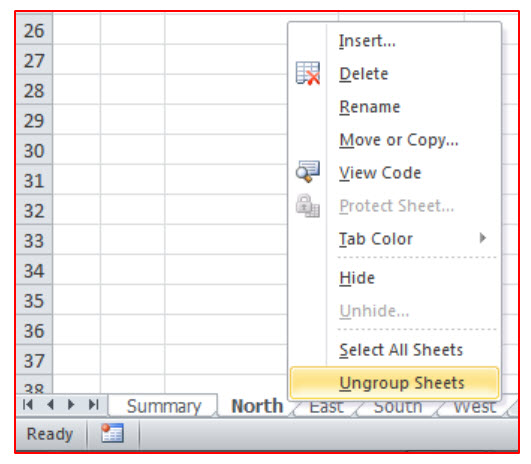
UnGrouping Sheets.
or
Group Selection Techniques – Non Contiguous Selection.
Using the Mouse and the Control key.
Select the first sheet that you intend to include in the group. Holding the Ctrl key down click on each sheet tab that you intend to include in the group.
Observe:
The Title bar shows [Group] and the appropriate sheet tabs have gone “Bright”.
3-D Formulas
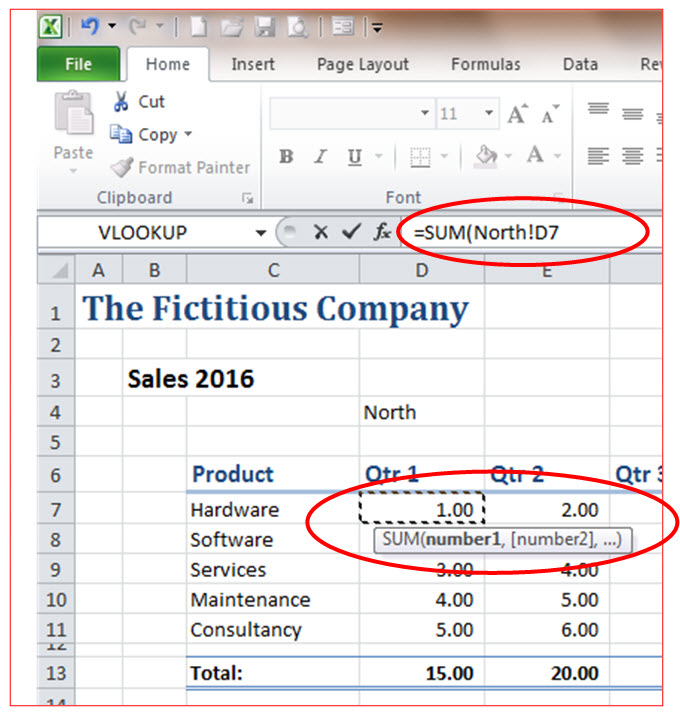
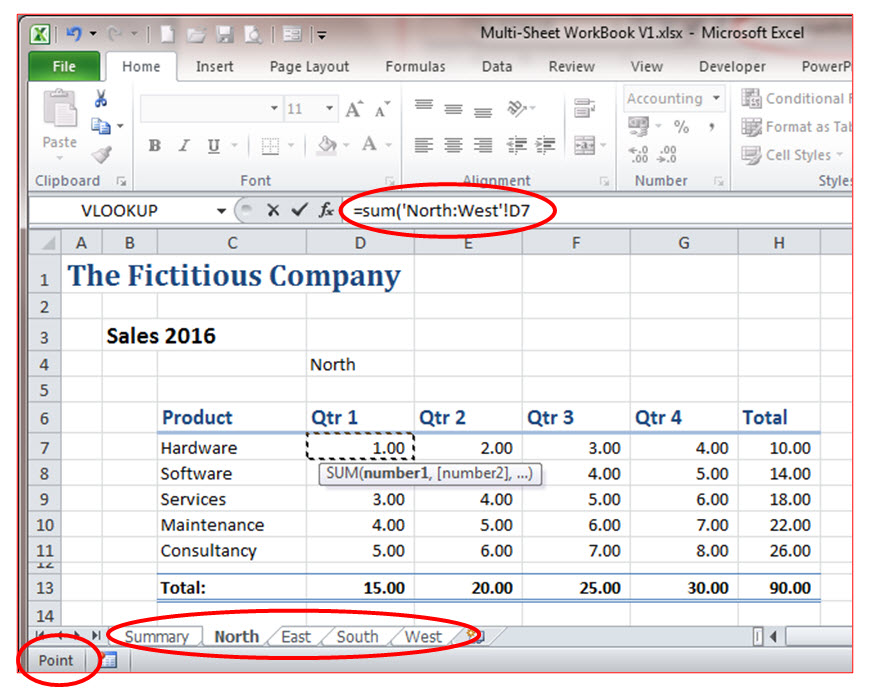
A Summary sheet which appears either as the first or last sheet can contain formulas which can reference the cells in identical positions in each of the required sheets in workbook.
In the Example we could create a simple SUM() function, say in cell D7, to drill through the cells in the sheets “North” all the way to the back sheet “West”. Whether there are 4, 40, 400 or 4,000 sheets the technique is exactly the same. Once the formula has been created it can be copied in the normal manner.
Procedure
Traps:
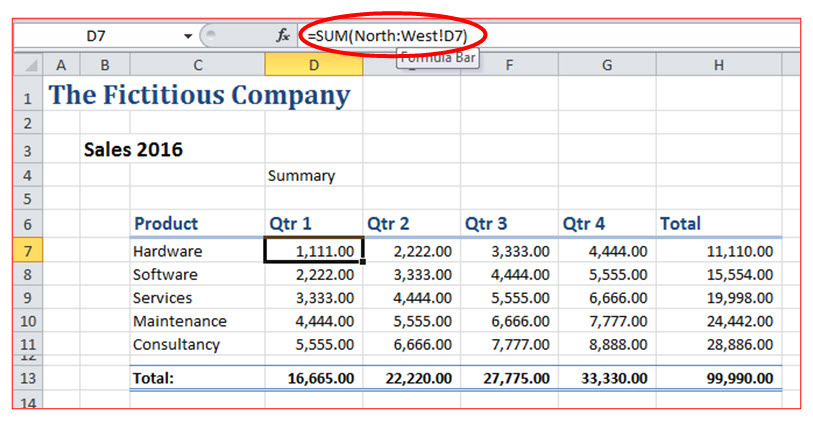
Like any formula which refers to “Range End Points” you must respect the “End Sheets”. In this case: North and West.
Any sheets currently between North and West when moved outside that range will no longer be included in the results.
Conversely, drop a suitable sheet between North and West and it will be included in the summary.
Tricks:
Consider having sheets with no data in (Top Sheet and Bottom sheet) as your range End Points.
Keep a “Template Sheet” so that you can copy extra sheets into the range as required.
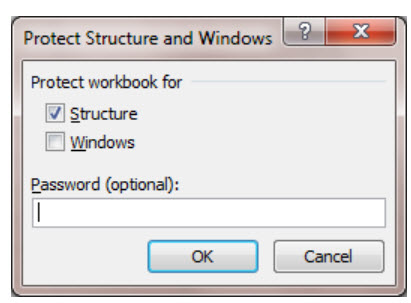
Prevent users moving sheets by Protecting the structure of your Workbook. (Review > Changes Group > Protect Workbook > )


Payments processed by

